Wednesday 11 January 2012

More Embellishments

The use of a hot glue gun produced these embellishments, flexible silicone moulds filled with the hot glue, when cool paint with black acrylic paint.  Inka Gold to highlight.  Small dots laid onto a craft sheet, while hot sprinkled with fine glitter or leave to cool and brush with Perfect Pearls.

Hot glue from moulds


The next project we used a small jam jar.  Material attached to polystyrene dome, lace around the edges, and decorate stick pins to insert in the cushion.


Finally with the Melt Pot at the ready, we dipped paper flower petals into hot UTEE to layer while still molten.  Also not shown here we also dipped skeleton leaves.

Utee Flower


In the afternoon seed beads, pins, findings and tools were available to complete the items. This was a great end of year workshop and I am now preparing for our first one of 2012 in February. Until next time....

Tuesday 10 January 2012

Embellishments

The last workshop of 2011 in November proved as busy as ever, with so many things on the go.  Everyone had been provided with a multitude of beads plus drilled dominoes, bingo no's, mahjong tiles, bamboo tiles, acrylic charms, metal charms, kilt pin, washers, bottle caps and dome stickers, paper flower layers, jar, material, lace and plain stick pins.  Along with findings and tools to turn them into pendants, pins etc.  In the preparation for this I spent hours drilling the game pieces with the help of a drill press and a vice.  When lowering the handle on the stand for each drilling I lost count of how many times the ball on the end of the handle rolled off and across the shed floor, the screw thread having worn a little.  Still they were finally finished and ready for action.


Game Pieces


Above are some of the decorated items, including poker chips (on right) of which I have hundreds purchased at a boot sale, so trying to think of any way we can use them!  Bottle caps, washer, dominoes, bamboo tiles. We used alcohol inks, brilliance ink pads and stamped with Stazon.  Sealed with Klear floor finish or Glossy Accents. 


Kilt Pin


Bottle caps pins, pendant, paper flower ring and beaded feather one of a pair later made into earrings, this little group now reside with my dil Anu.

I have attached a chain to each side of the kilt pin above using lobster clasps which can easily be detached to use as a pin.

Unfortunately I forgot my camera, so the above are just samples I prepared for the workshop.  All for now, more embellishments tomorrow....Until then


Monday 9 January 2012

Exploding Scrapbook Box

October we tackled an exploding box, all card supplied along with measurements for cutting and folding. A lot to do and not enough hours in the day to decorate all sections, but here is a picture of the sample box followed by snap shots of many others half completed.

Sample box (using Graphic 45 paper)

by Annie

by Christine (folding flat to transport to Australia)

by Jane (punched dragonflies on lid)

by Linda

by Elizabeth

by Victoria before layering

by Pamela

by Angie


Lots of concentration this day, decoration to be completed at home. Even half completed they looked fabulous.  The following pic is of  boxes I made a while ago with more details on my picturetrail  Bits and Pieces Album (see right column for link).

Monochrome scrapbox

made for my grand daughters birthday a while back.


All for now, coming soon Embellishments mmmmmm lots to look at.  Until then.....

Saturday 7 January 2012

Ad Hoc Crafting

The September workshop proved very different from the usual.  I provided various items from my seemingly unending collection of  "too good to miss out on a bargain" accumulated stuff.  Wooden frames, Bisque, Plaster, Paper Mache boxes of all shapes and sizes.  Supplies available for everyone to paint and decorate as each person decided.  A sample of one of the boxes was provided as a guide but everyone had a go and although I did not take photographs of all the finished items, here are a few, starting with my sample box.

Steampunk style sample box.


Mirror by Tanya


Box by Elizabeth


Bisque painted by Christine (holding paper bead bracelet made on the day)


Plaster painted by Angie


Box painted and decorated using paper napkin by Margaret B.

Fabulous day I wish I had taken more photographs of all the finished items.  We ended the day making paper beads and went on to make stretch bracelets and earings for many of those remaining in the afternoon.  Here are a few pics of the finished beads, plus many more I managed to make while on holiday, a bit addictive I must say, but now I have to find a use for them.

Paper Beads


Close up of varnished beads


Glitter varnished paper beads.


  Coming up.....exploding scrapbook boxes, another great workshop from October.  Until then...

Friday 6 January 2012

Cards to Go

August workshop found us making early Christmas cards, we had fun with die cuts, metal tape (again) alcohol inks and paint.  Several cards were produced throughout the day and below are a few of them:-
  
Waterfall card

 All sections were precut ready to assemble, stamp and put together for this waterfall card that was requested.  Quite fiddly, but worth the work to put it together and can of course be used for any type of card, not just Christmas. Photos could be placed on each square instead of stamped images, to make it more personal for the recipient.


Technique from Craft Stamper

This is a simple technique, I found in Craft Stamper last year, mask all sides off and with a blending tool colour the oblong within using distress ink. I have used a Penny Black stamp and embellished with red stickles.  This card could be used for any occasion just by changing the stamps and ink colour used.


Credit for this design must go to Linda Elbourne, though I have changed it slightly due to different die cut and stamps used for the purpose of the workshop.  Narrow corrugated card painted with black acrylic, highlighted with silver.  The snowflake die cut embossed with silver embossing powder.  The greeting triple embossed.

<><>


</></>
Snowflake

A snowflake die cut adhered to cardstock and covered with foil tape, squiggle around the background with stylus, painted with Aqua acrylic paint dabber, lightly sanded, mat and layer onto card.


Similar technique to previous card, using Tim Holtz Reindeer die cut and punched snowflakes, but coloured with alcohol inks instead of paint. Lightly sanded back to reveal plain metal on raised areas.

That is all for today, will be back tomorrow with more updates. I might even find out how to arrange the layout a lot better than I have managed. Oh drat......  Until then....


Thursday 5 January 2012

Metal Foil Tape

As you might have guessed I love this metal adhesive backed tape, managing to incorporate it on a lot of the projects as it is so versitile.


metal tape before ink


In July we used it to cover a frame.  First applying die cuts and punched images to the frame, covering with the tape (first using a template to cut the tape as the frame is oblong and this made it easier to apply).  Defined with a paper stump, a stylus also used to add more detail. 


After inking


 Alcohol inks then used to colour the metal.  Lastly raised areas sanded to reveal the metal.  As well as die cuts, several small additions of mesh added underneath.  Additional squares added to make corner features.  Metal wheel tools added even more of a design.  Stickles added on random areas.


Using embossed metal tape and inks


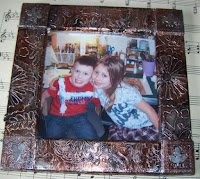
Below is a frame where the metal tape (before removing the backing) had been embossed using an embossing folder.  When applied to the frame, it still holds a lot of the definition.  The photo is of my lovely grandchildren helping me in my craft room.


We finished with a card, where we used a punched butterfly shape under the metal tape onto cardstock, cut with a scallop punch.  Squiggles added around the die cut to give more detail.  Alcohol inked and lightly sanded.    

Until next time...

Target

Just have to share with you a personal achievement.  Having weighed in weekly for quite a long time now (the scenic route and not very direct) I have now reached my own set target losing a total of 5 and a half stone. Yeehaaar.  Now to get used to maintaining it.  Nuff about that.  Hope you achieve all you set out to do in 2012.
Before (enjoying a Devon afternoon cream tea)


Not quite after, but a few months ago with my lovely niece Beth,  my equally lovely son Robert at the centre pulling faces, what is new there then!

Until next time.....


Wednesday 4 January 2012

AT LAST

I am back along with a new year resolution to blog more often in 2012.  Happy New Crafting Year to everyone.


Over the next few days I will endeavour to update with some of the projects we enjoyed at the Harston workshops.  Kicking off with a folder to hold Artist Trading Cards.  We waxed, painted, sprayed and stencilled backgrounds for several of the ATC's then made the folder from an A4 sheet.


The folder is A4 sheet of card stock (or double sided scrapbook card trimmed to 12 x 6"). Fold in half length ways, open and repeat width ways, open and fold both long ends to centre (cupboard fold), open and cut down the centre long length and stop at last fold.  Accordion fold all folds, glue ends section closed or form a pocket.
Attach clear ATC's pockets to each side to hold the cards.  This is the view of the open folder:-


and this is the reverse side.

This folder is also ideal to hold photographs. This was a great workshops, very messy with inks and paint etc.   Until next time....